Show the whole setup, sell it in one click
Nobody sets up a home office one product at a time, but most stores make them shop that way. Shop by Room lets you put a desk, a chair, a lamp and a shelf together in one room, so shoppers see the whole setup and buy all of it, or just the pieces they want, in one click. Here's how to switch it on and build your first room.
By The BTAB Team
Think about someone setting up a home office. They don't want "a desk". They want a desk, a chair that suits it, a lamp for the corner, and a shelf for the files that are currently on the floor. They want a setup.
Then they open your store and the setup falls apart. The desk is on one product page and the chair is on another, both photographed on a white background. The lamp is under Lighting, and the shelf is three categories away. Every product is fine on its own, but nothing shows the shopper the thing they're trying to picture: these pieces, together, as one office. So they open four tabs, add things to the cart one at a time, and give up halfway, or buy the desk and look elsewhere for the rest.
You probably already sell everything that office needs. The problem is how it's shown. Your store shows products one at a time, and the shopper is trying to buy a setup.
What Shop by Room does
Shop by Room is a simple app for your Btab store, and its job is to present your products. You build a room: one photo with several of your products in it that suit each other, and you can tag each product where it appears in the photo if you like. Shoppers see the whole setup on one page and buy it.
For the shopper, a room page gives them:
- The whole setup at a glance. The desk, chair, lamp and shelf are in one photo, so they can see how the pieces look together before they buy any of them.
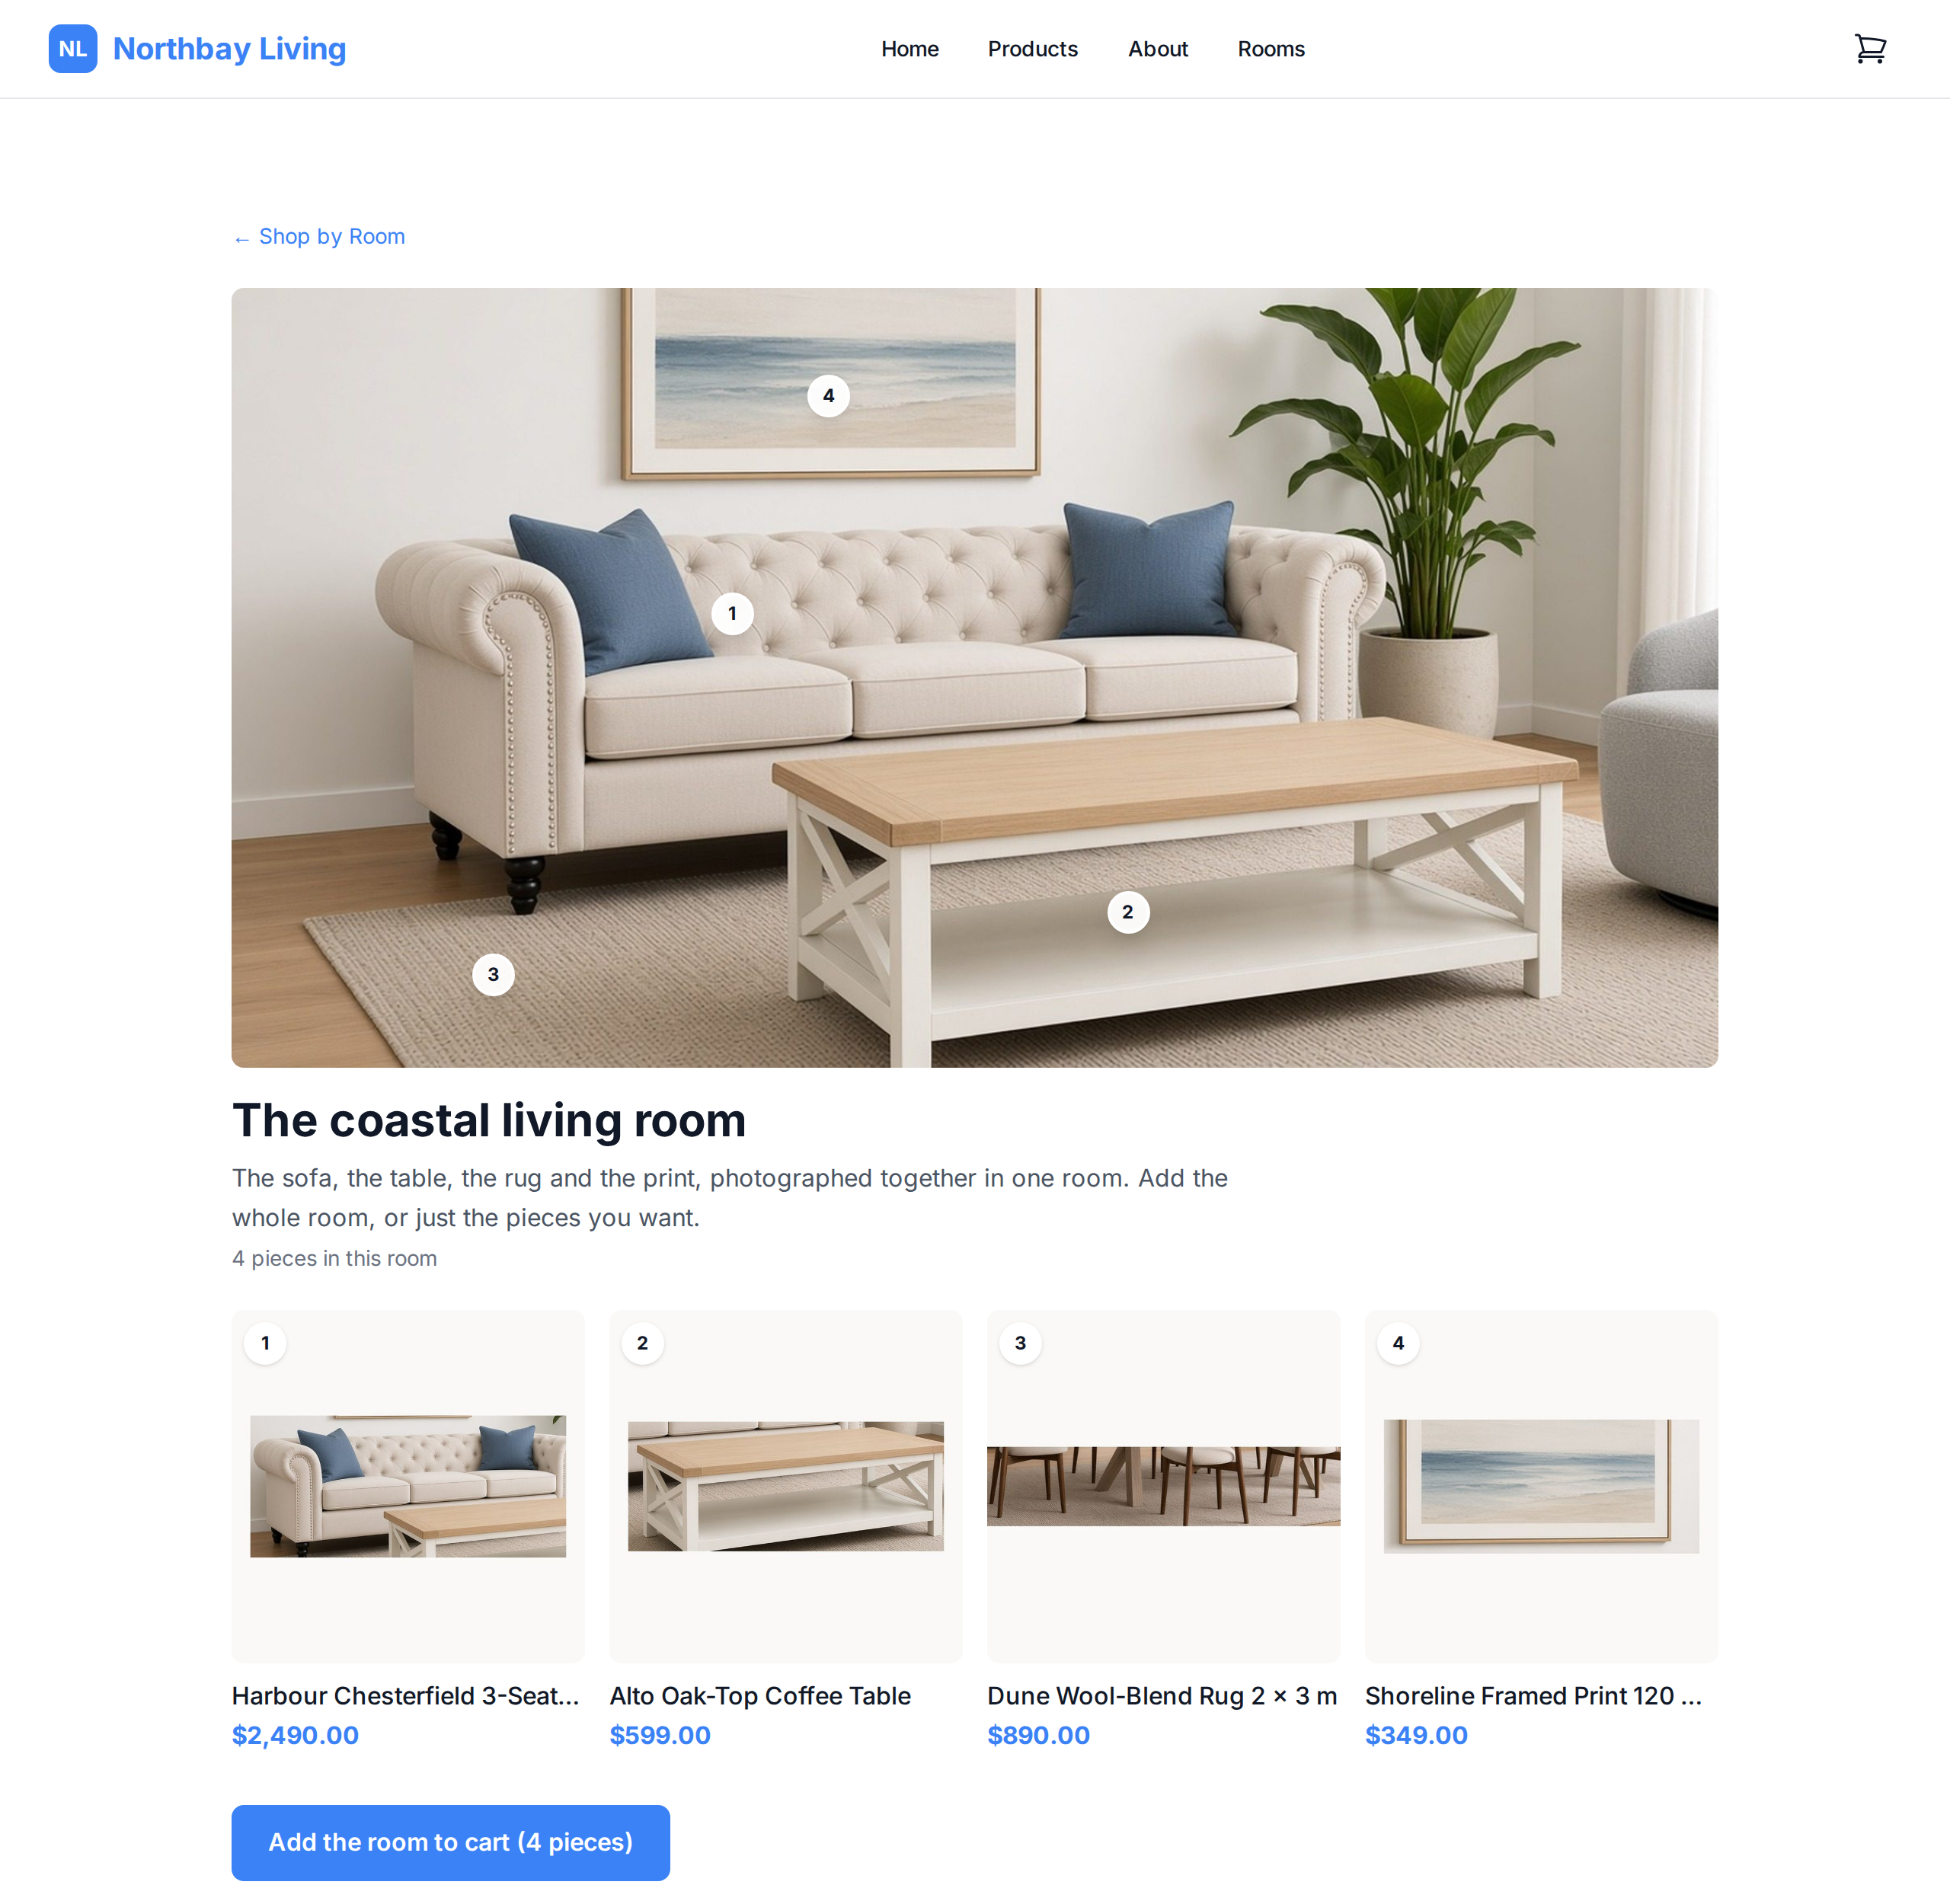
- Every piece listed, and tagged if you want. A numbered list of the products runs under the photo. If you've tagged them, matching numbered pins sit on each piece in the photo, and a tap shows which product it is. Wide photos can be slid sideways.
- Buy all of it, or just a few, in one click. Add the room to cart puts every piece in the cart at once. A shopper who only wants the chair and the lamp can add just those straight from the list, using the + on each piece (on a computer it appears when you hover over the piece). If some pieces are quote-only or out of stock, the button says so plainly: it adds what can be bought now and offers one quote request for the rest.
For your store, every room is also a page that search engines can find. It has its own web address at /rooms/<name>, its own search title and description, and a place in your sitemap. It's also marked up so Google can read it as a list of products. You get a page built around a whole setup, like "home office", as well as the individual product pages you already have. There's also a Shop by Room page at /rooms that lists all your rooms, and a Shop by Room section for your home page.
To be clear about what it isn't: Rooms doesn't measure anything or check that pieces fit a shopper's space. It's a way to show products together, and it only shows the products you choose to put in the room.
Step 1: Turn it on
Rooms is an app, so it's off until you switch it on. In your vendor dashboard, go to My Store → Apps, find Shop by Room, and turn it on.
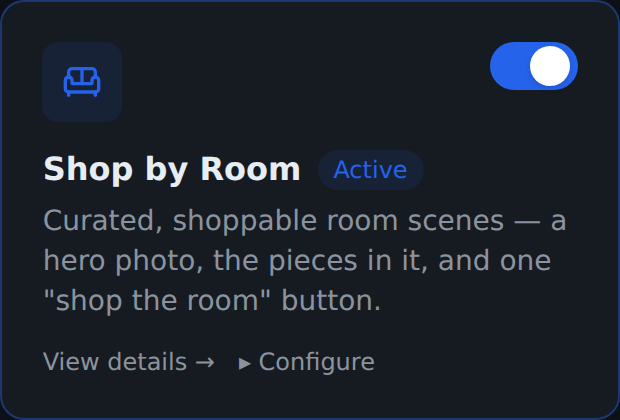
Switching it on does three things straight away:
- It adds a Rooms page to your dashboard (under My Store), where you build rooms.
- It adds a Shop by Room section to your storefront home page, under the hero.
- It adds Rooms to your storefront's header menu, so shoppers can find
/rooms.
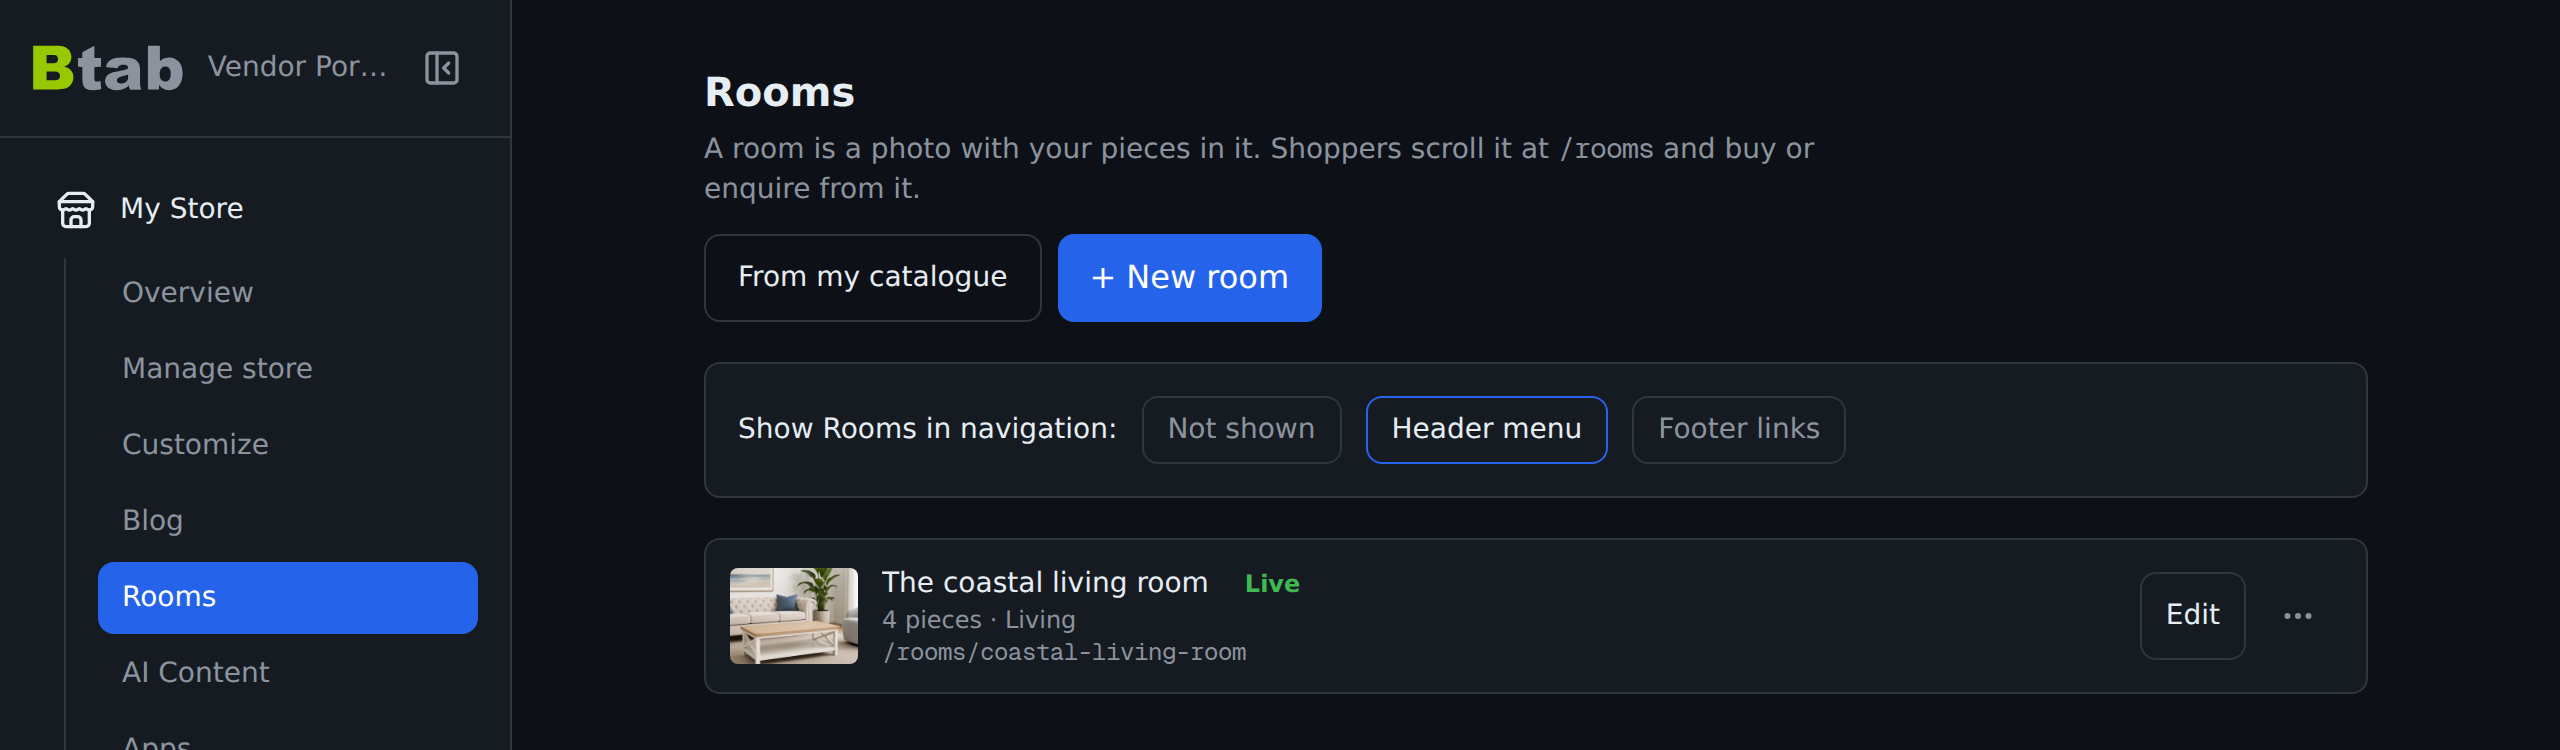
You can move that menu link to the footer, or hide it, from the Rooms page. Turning the app off takes all of it back off your storefront.
Step 2: Start a room
Open My Store → Rooms. You have two ways in:
- + New room builds one room from scratch. Most vendors start here.
- From my catalogue looks through the products you already sell and drafts rooms for you. It finds product ranges that were designed together, and supplier photos that show several of your products in one shot. It tells you how many it found before it makes anything, and every room it makes is a draft. Nothing reaches your storefront until you open it, check it and publish it.
Building a room takes three screens: Photo → Pieces → Publish. The screenshots below show a living room, but the steps are the same for an office, a bedroom or any other room.
Step 3: Add the room photo
Tap Take or choose a photo and pick a photo of the setup. The photo is what sells the room, so a few tips:
- Use a wide shot. Landscape works best, and a phone's Panorama mode is even better, because shoppers can slide across a wide photo on the room page.
- Get the whole setup in frame. For an office that means the desk, the chair, the lamp and the shelf. A piece that's cropped off can't be tagged.
- Make it a room, not a product. A single product on a white background isn't a room, and Rooms will tell you so.
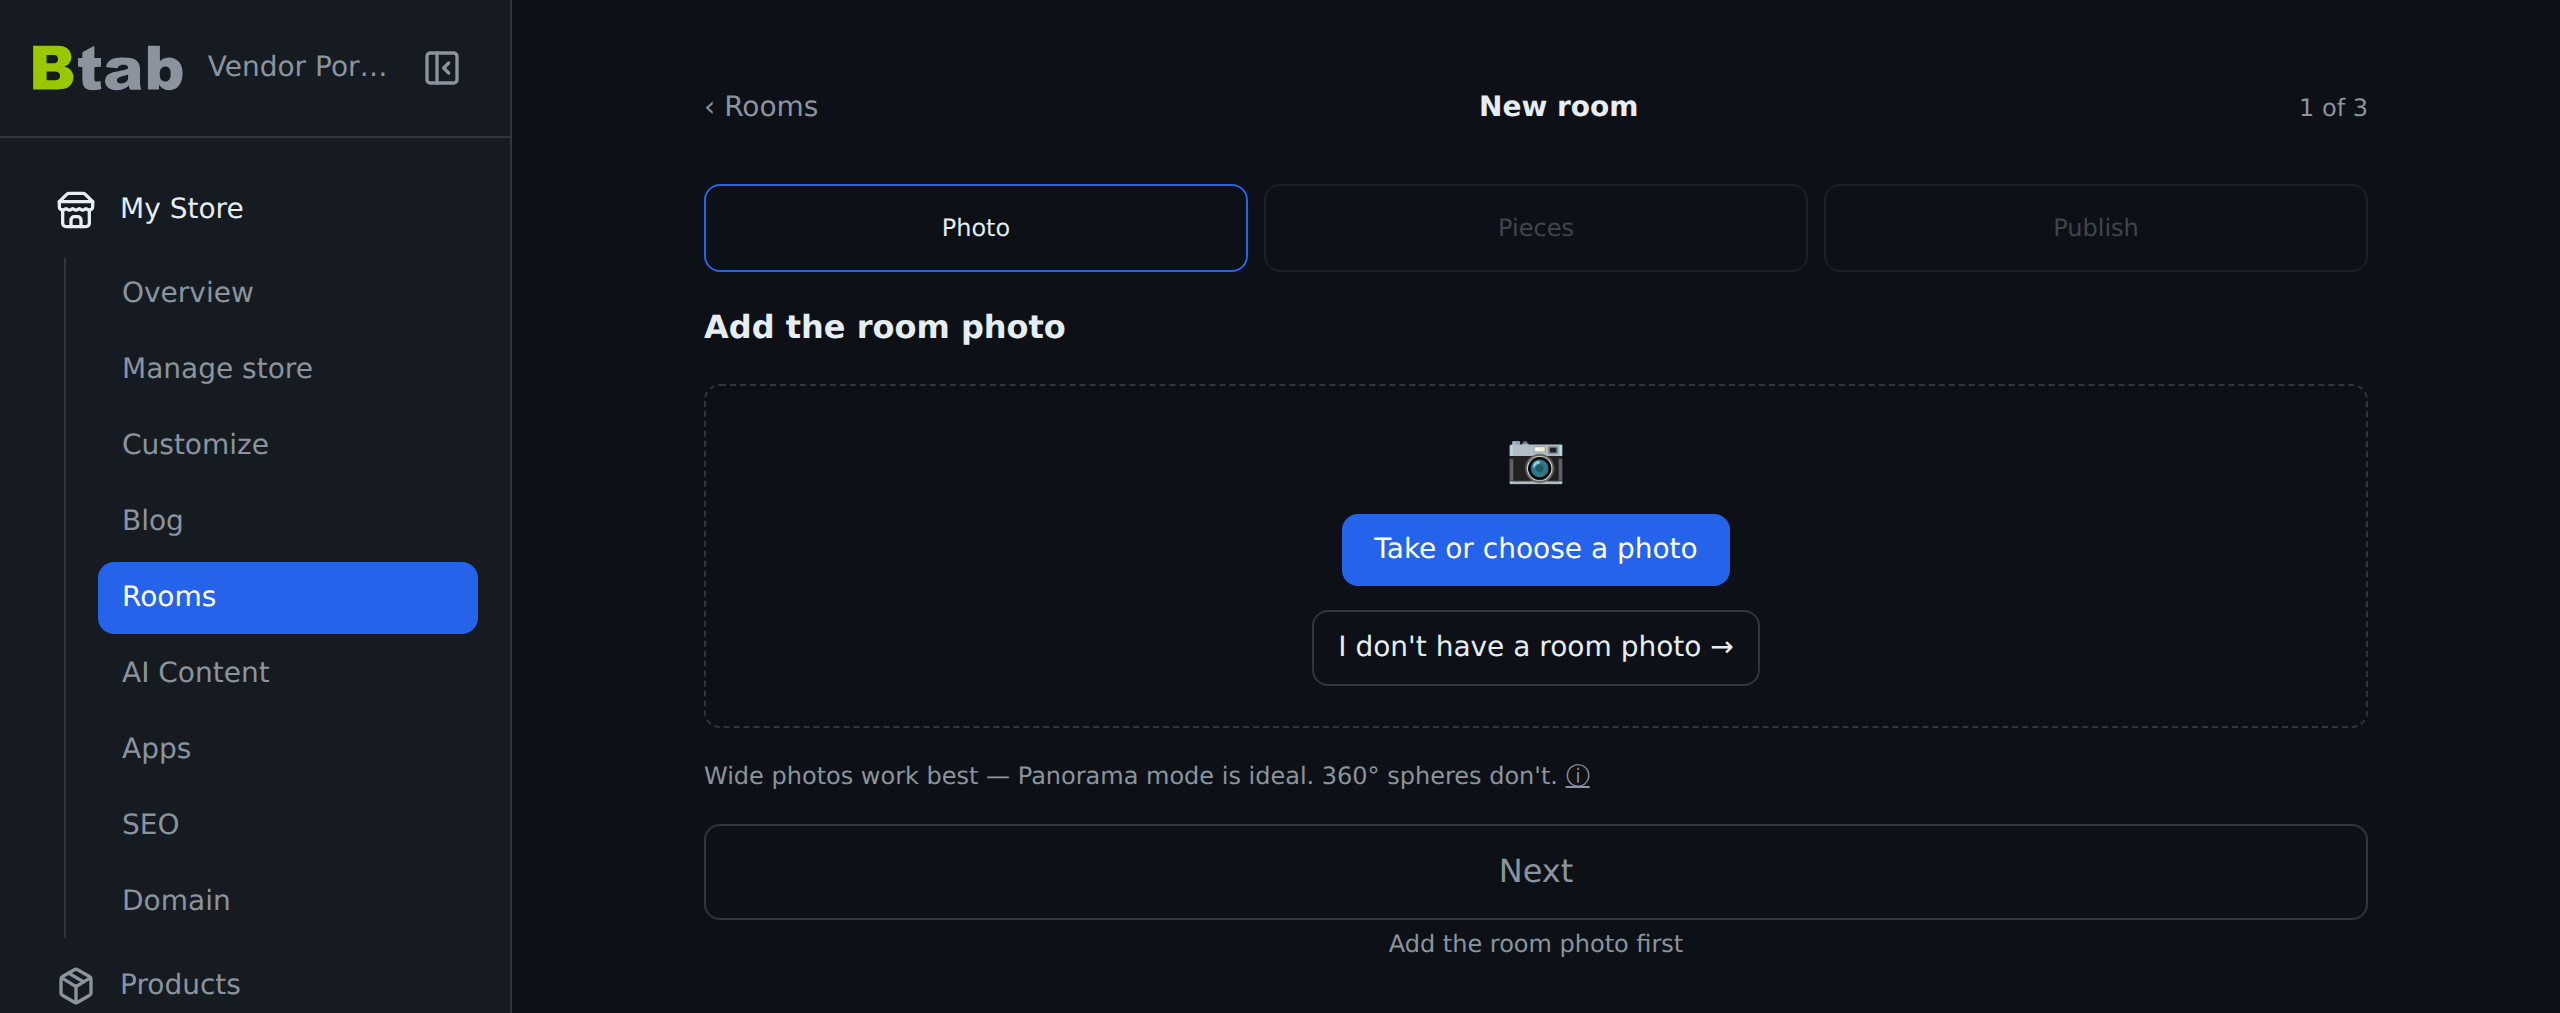
If a photo is too narrow to slide, you'll get a warning and can Use anyway or Choose another. If a photo can't be used at all, for example a 360° photo, you'll be told why and what to try instead.
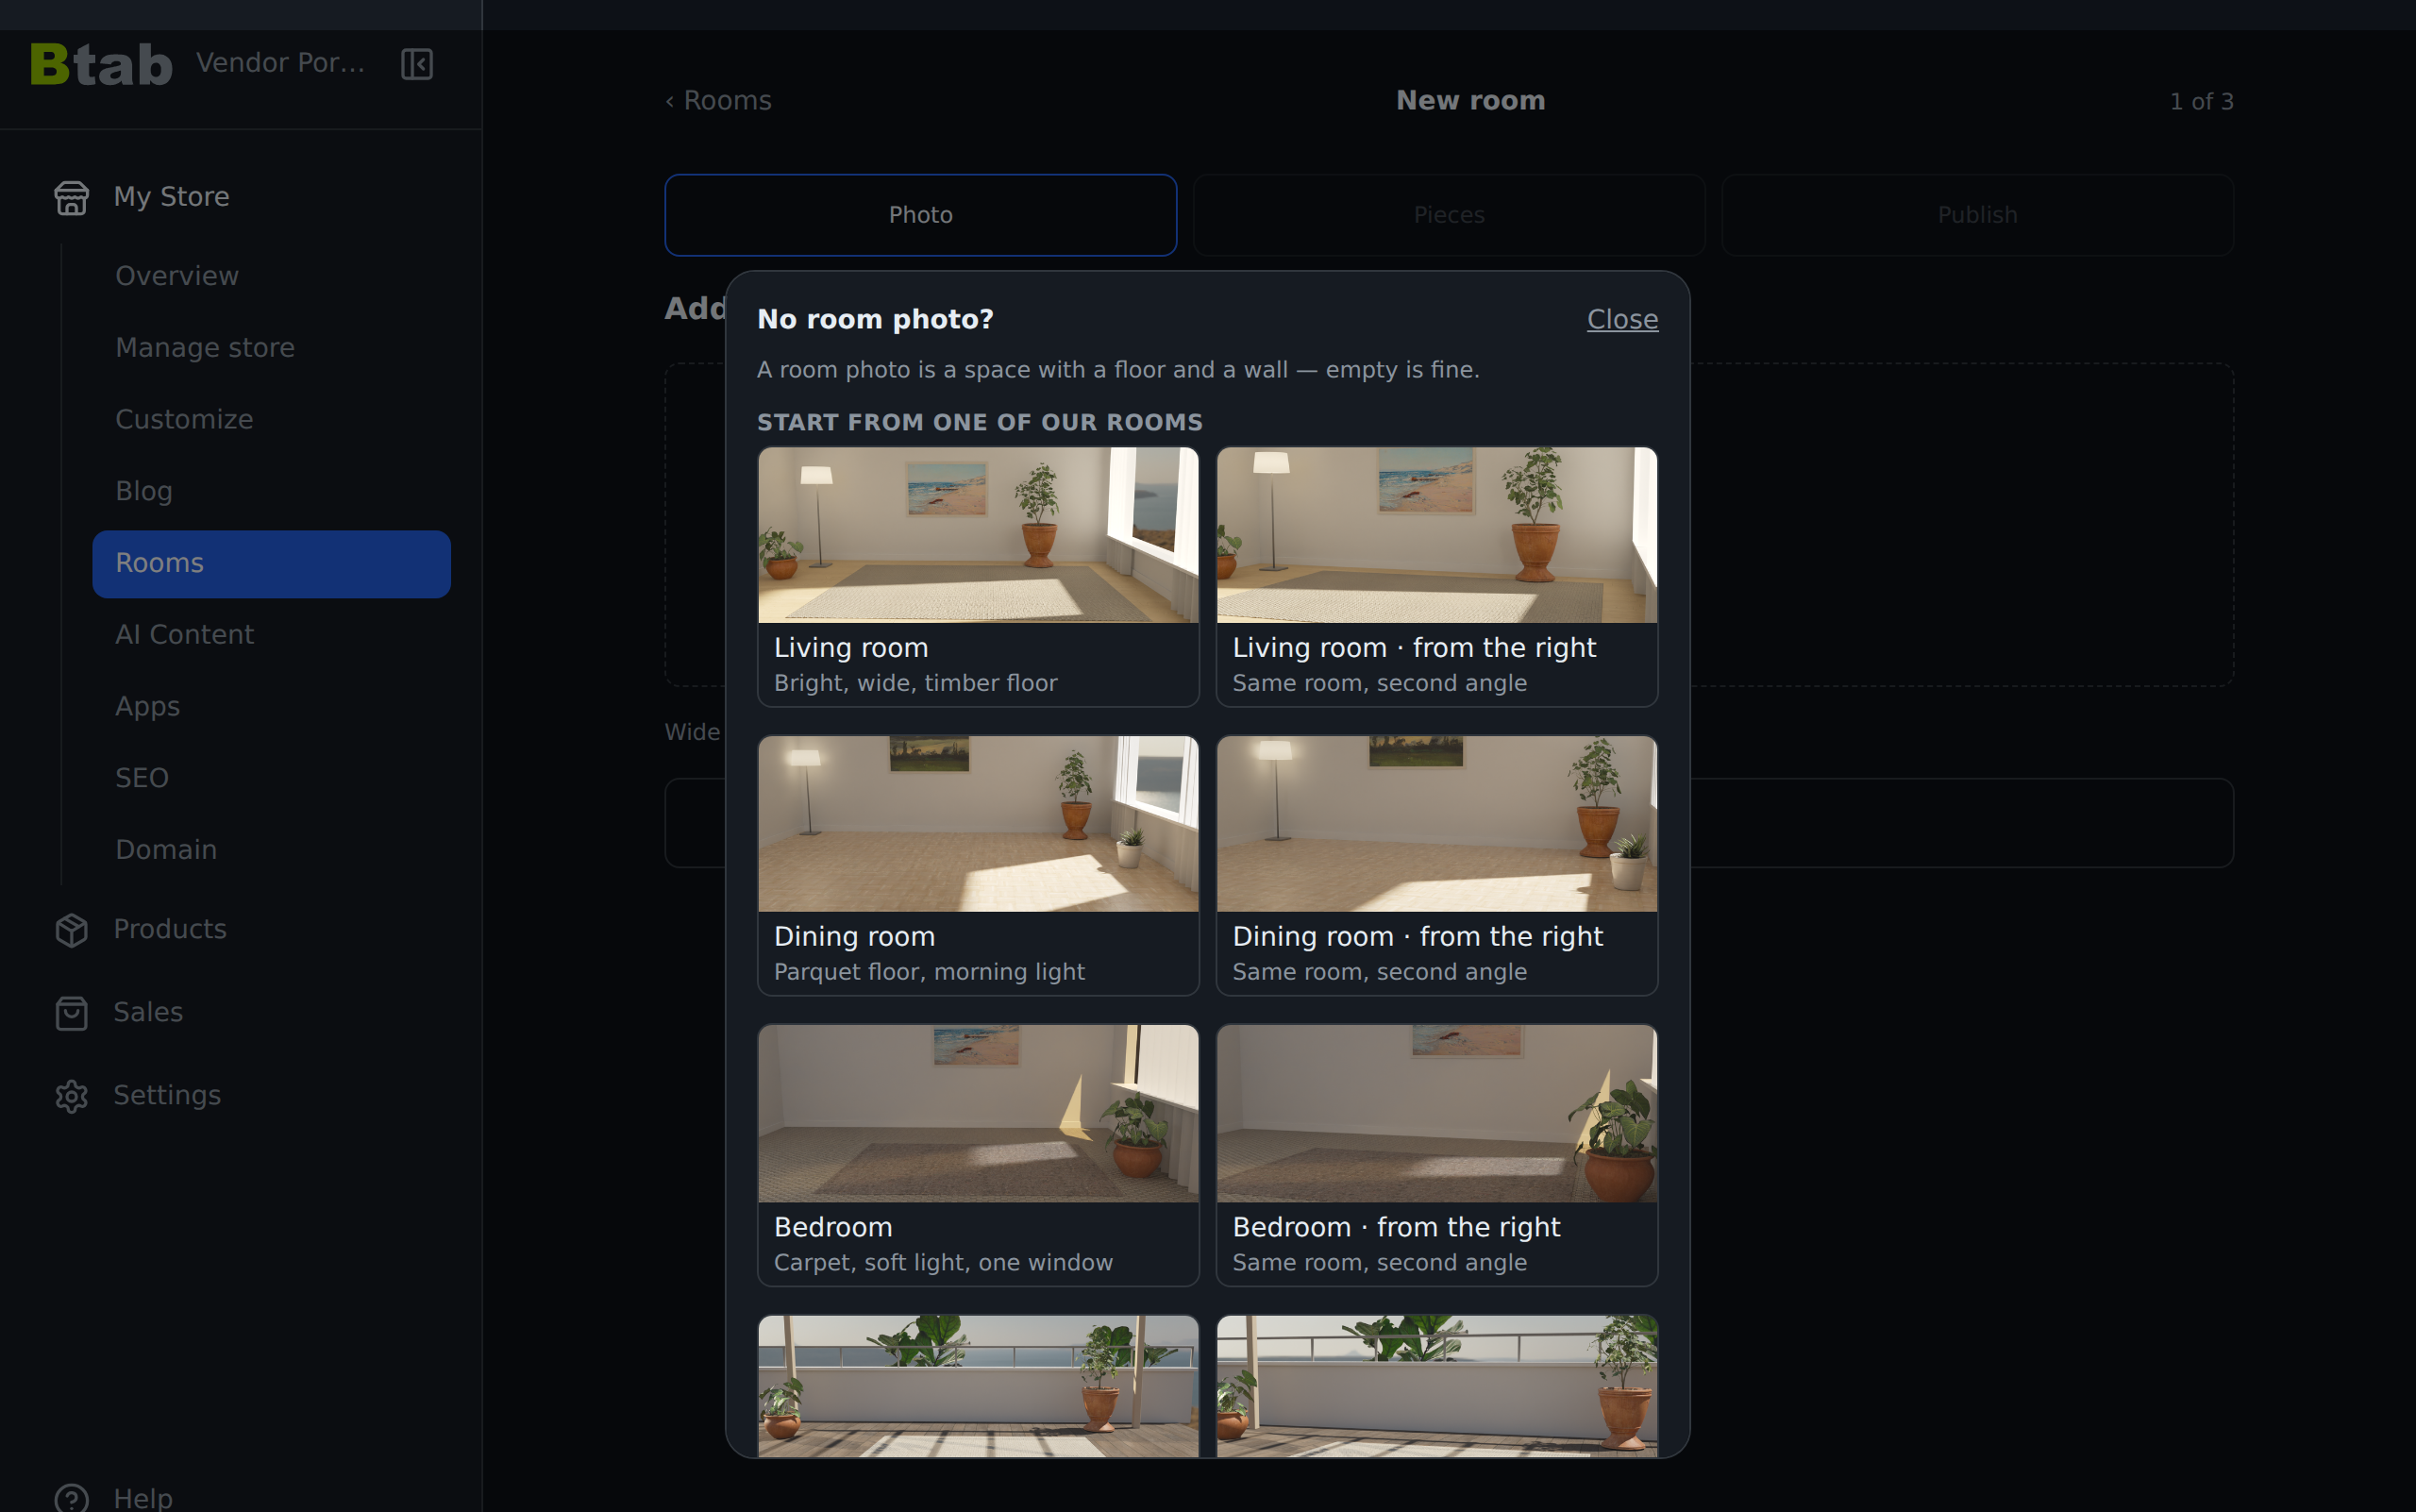
No room photo? That's common if you resell products you've never set up yourself. Tap I don't have a room photo →. Rooms shows you any supplier photos that already have two or more of your products in them, which is often exactly the shot you need. It also offers a set of empty starter rooms you can build in: living, dining, bedroom and terrace, each from two angles.
Step 4: Add the pieces
Now add the products that belong in the room. There are two ways to do it, and you can mix them:
- Tap a piece in the photo. A search opens ("Which piece is this?"). Find the product in your catalogue and tap Add. The product joins the room, and a numbered pin lands where you tapped.
- Add without pinning. Tap + Add a piece without pinning to add a product to the room's list without placing a pin. Tagging is optional: every piece in the room is listed and can be bought whether it has a pin or not.
Either way, the search stays open after you add something, so you can go straight on to the next piece. Close it when you're done.
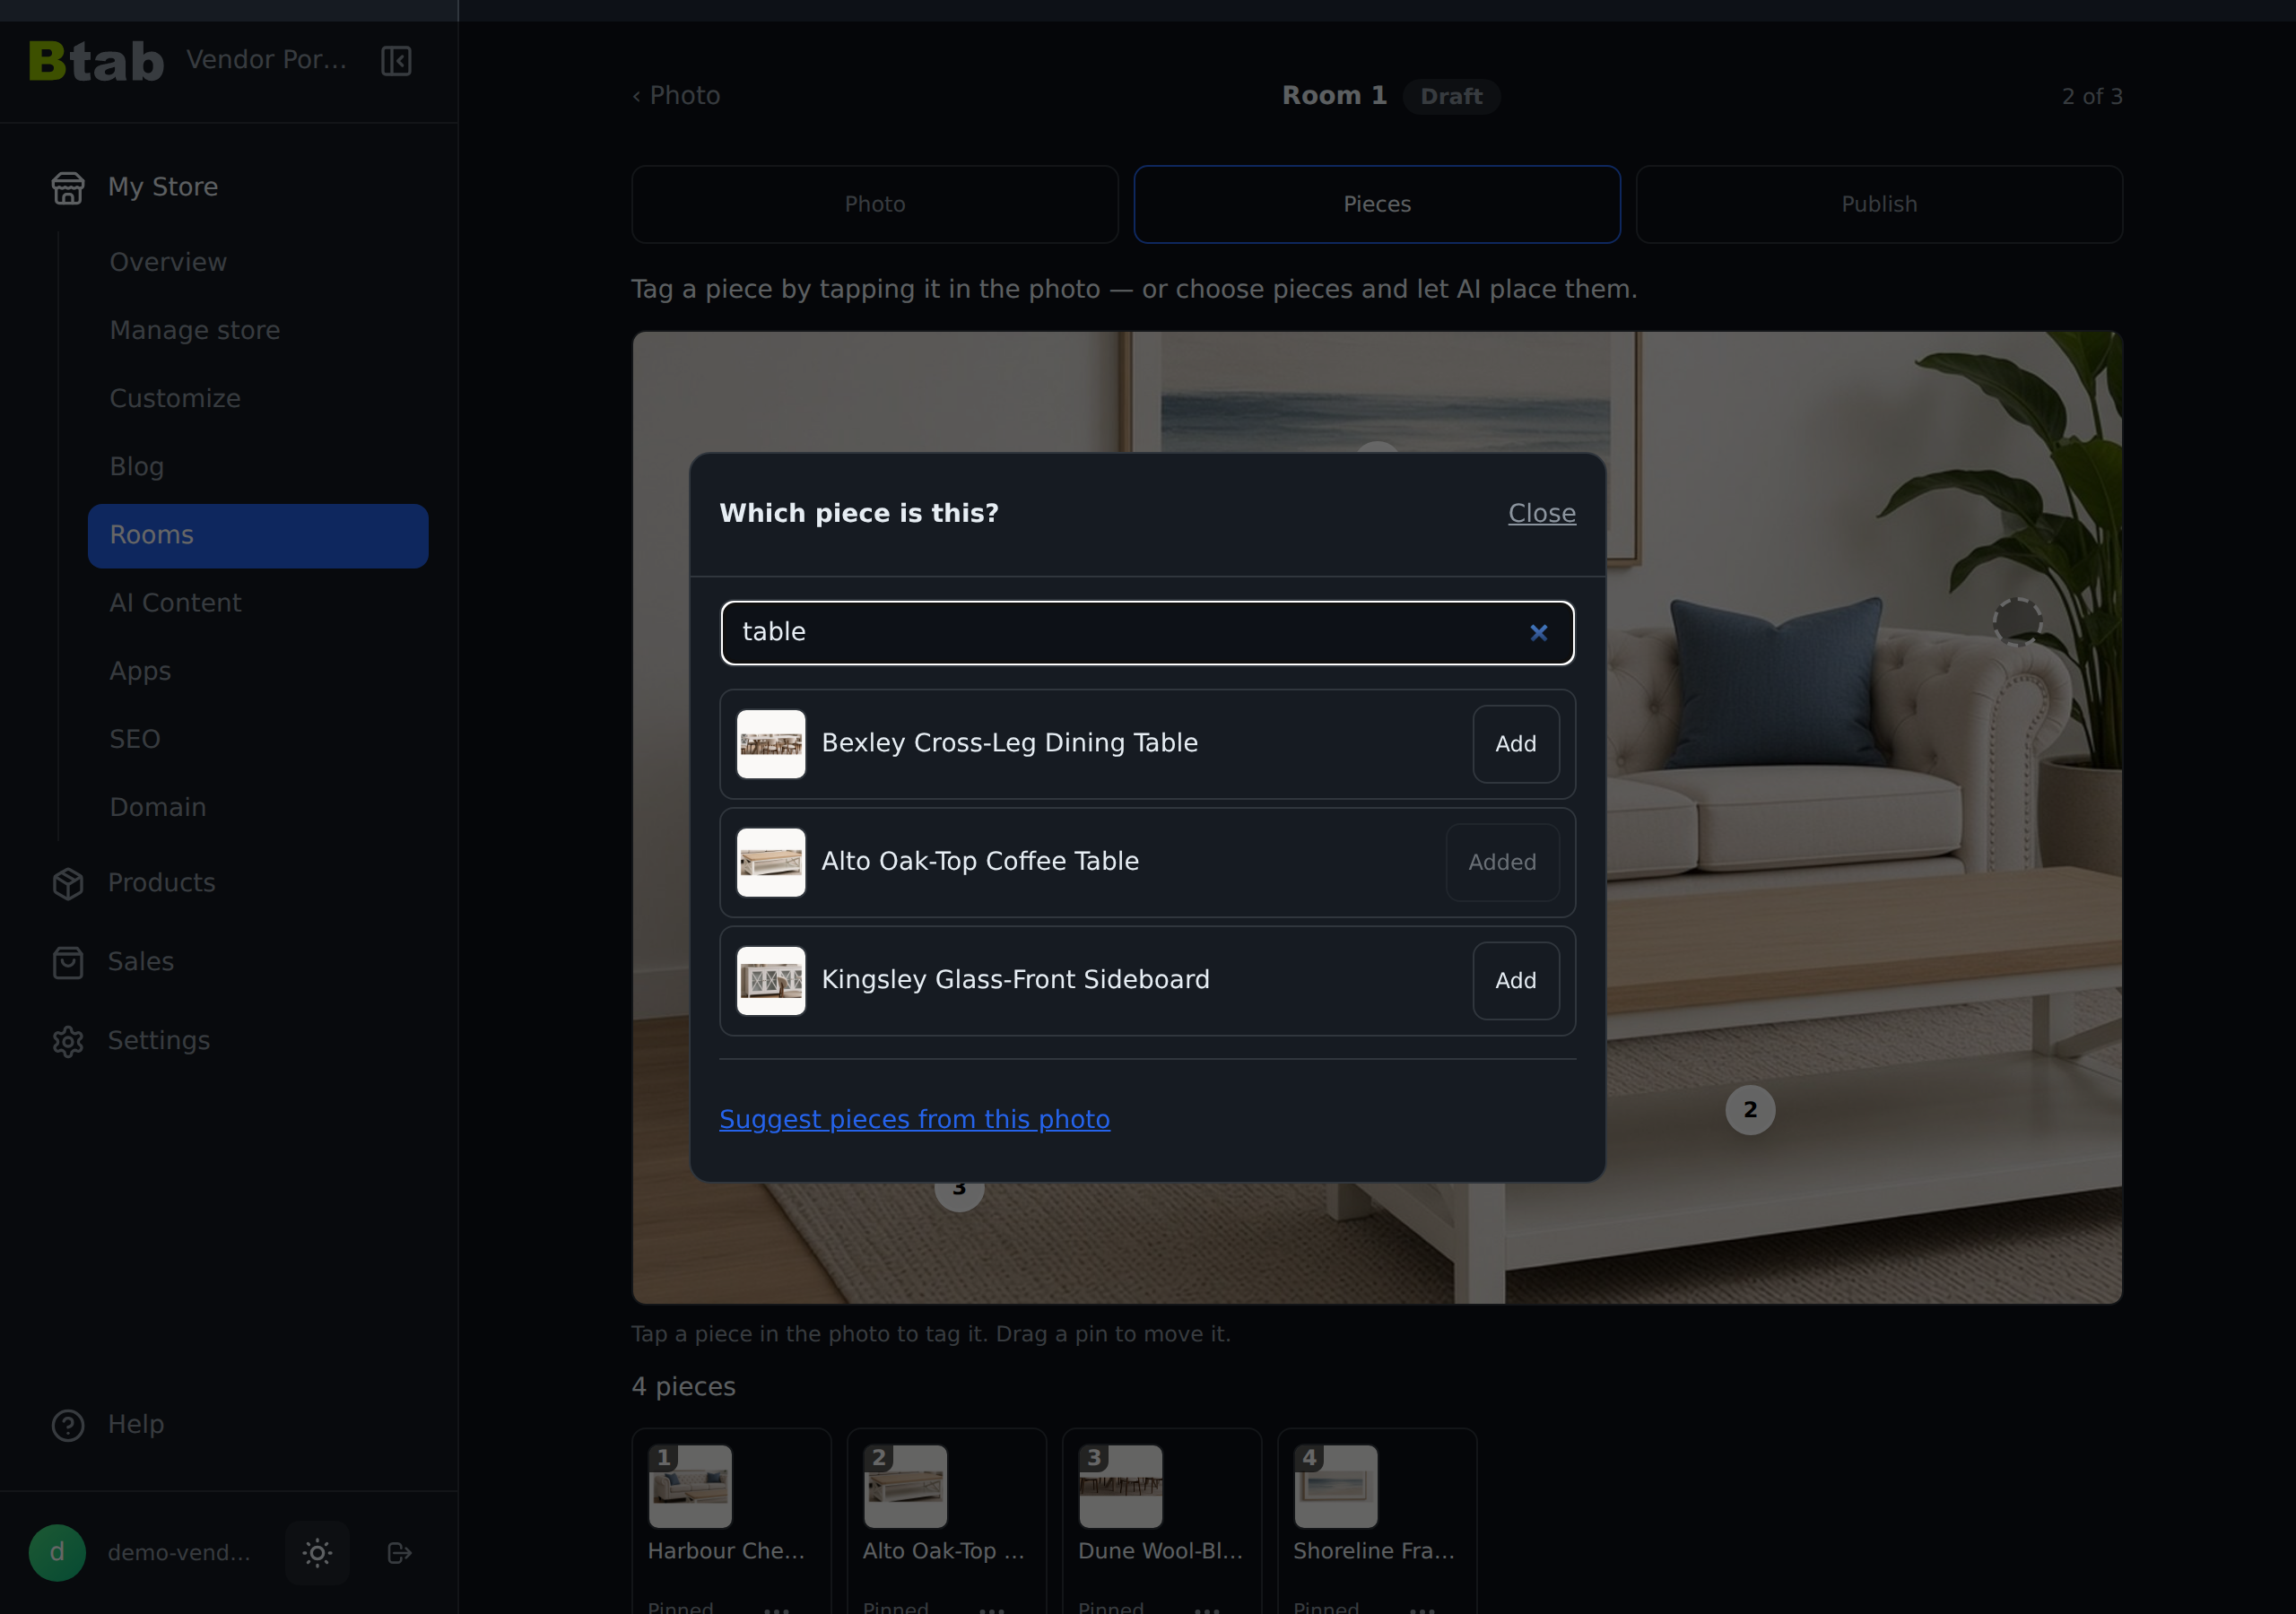
If you'd rather not search, Suggest pieces from this photo (inside the same search) suggests products from your catalogue that are likely to belong in the room: pieces from the same supplier photo, the same range, or the same kind as what's already in it. Each suggestion says why it's there, and nothing is added until you tap Add.
To change a piece, tap the ⋯ on it in the list under the photo. There you can Move pin, Unpin (the piece stays in the room), or Remove from room.
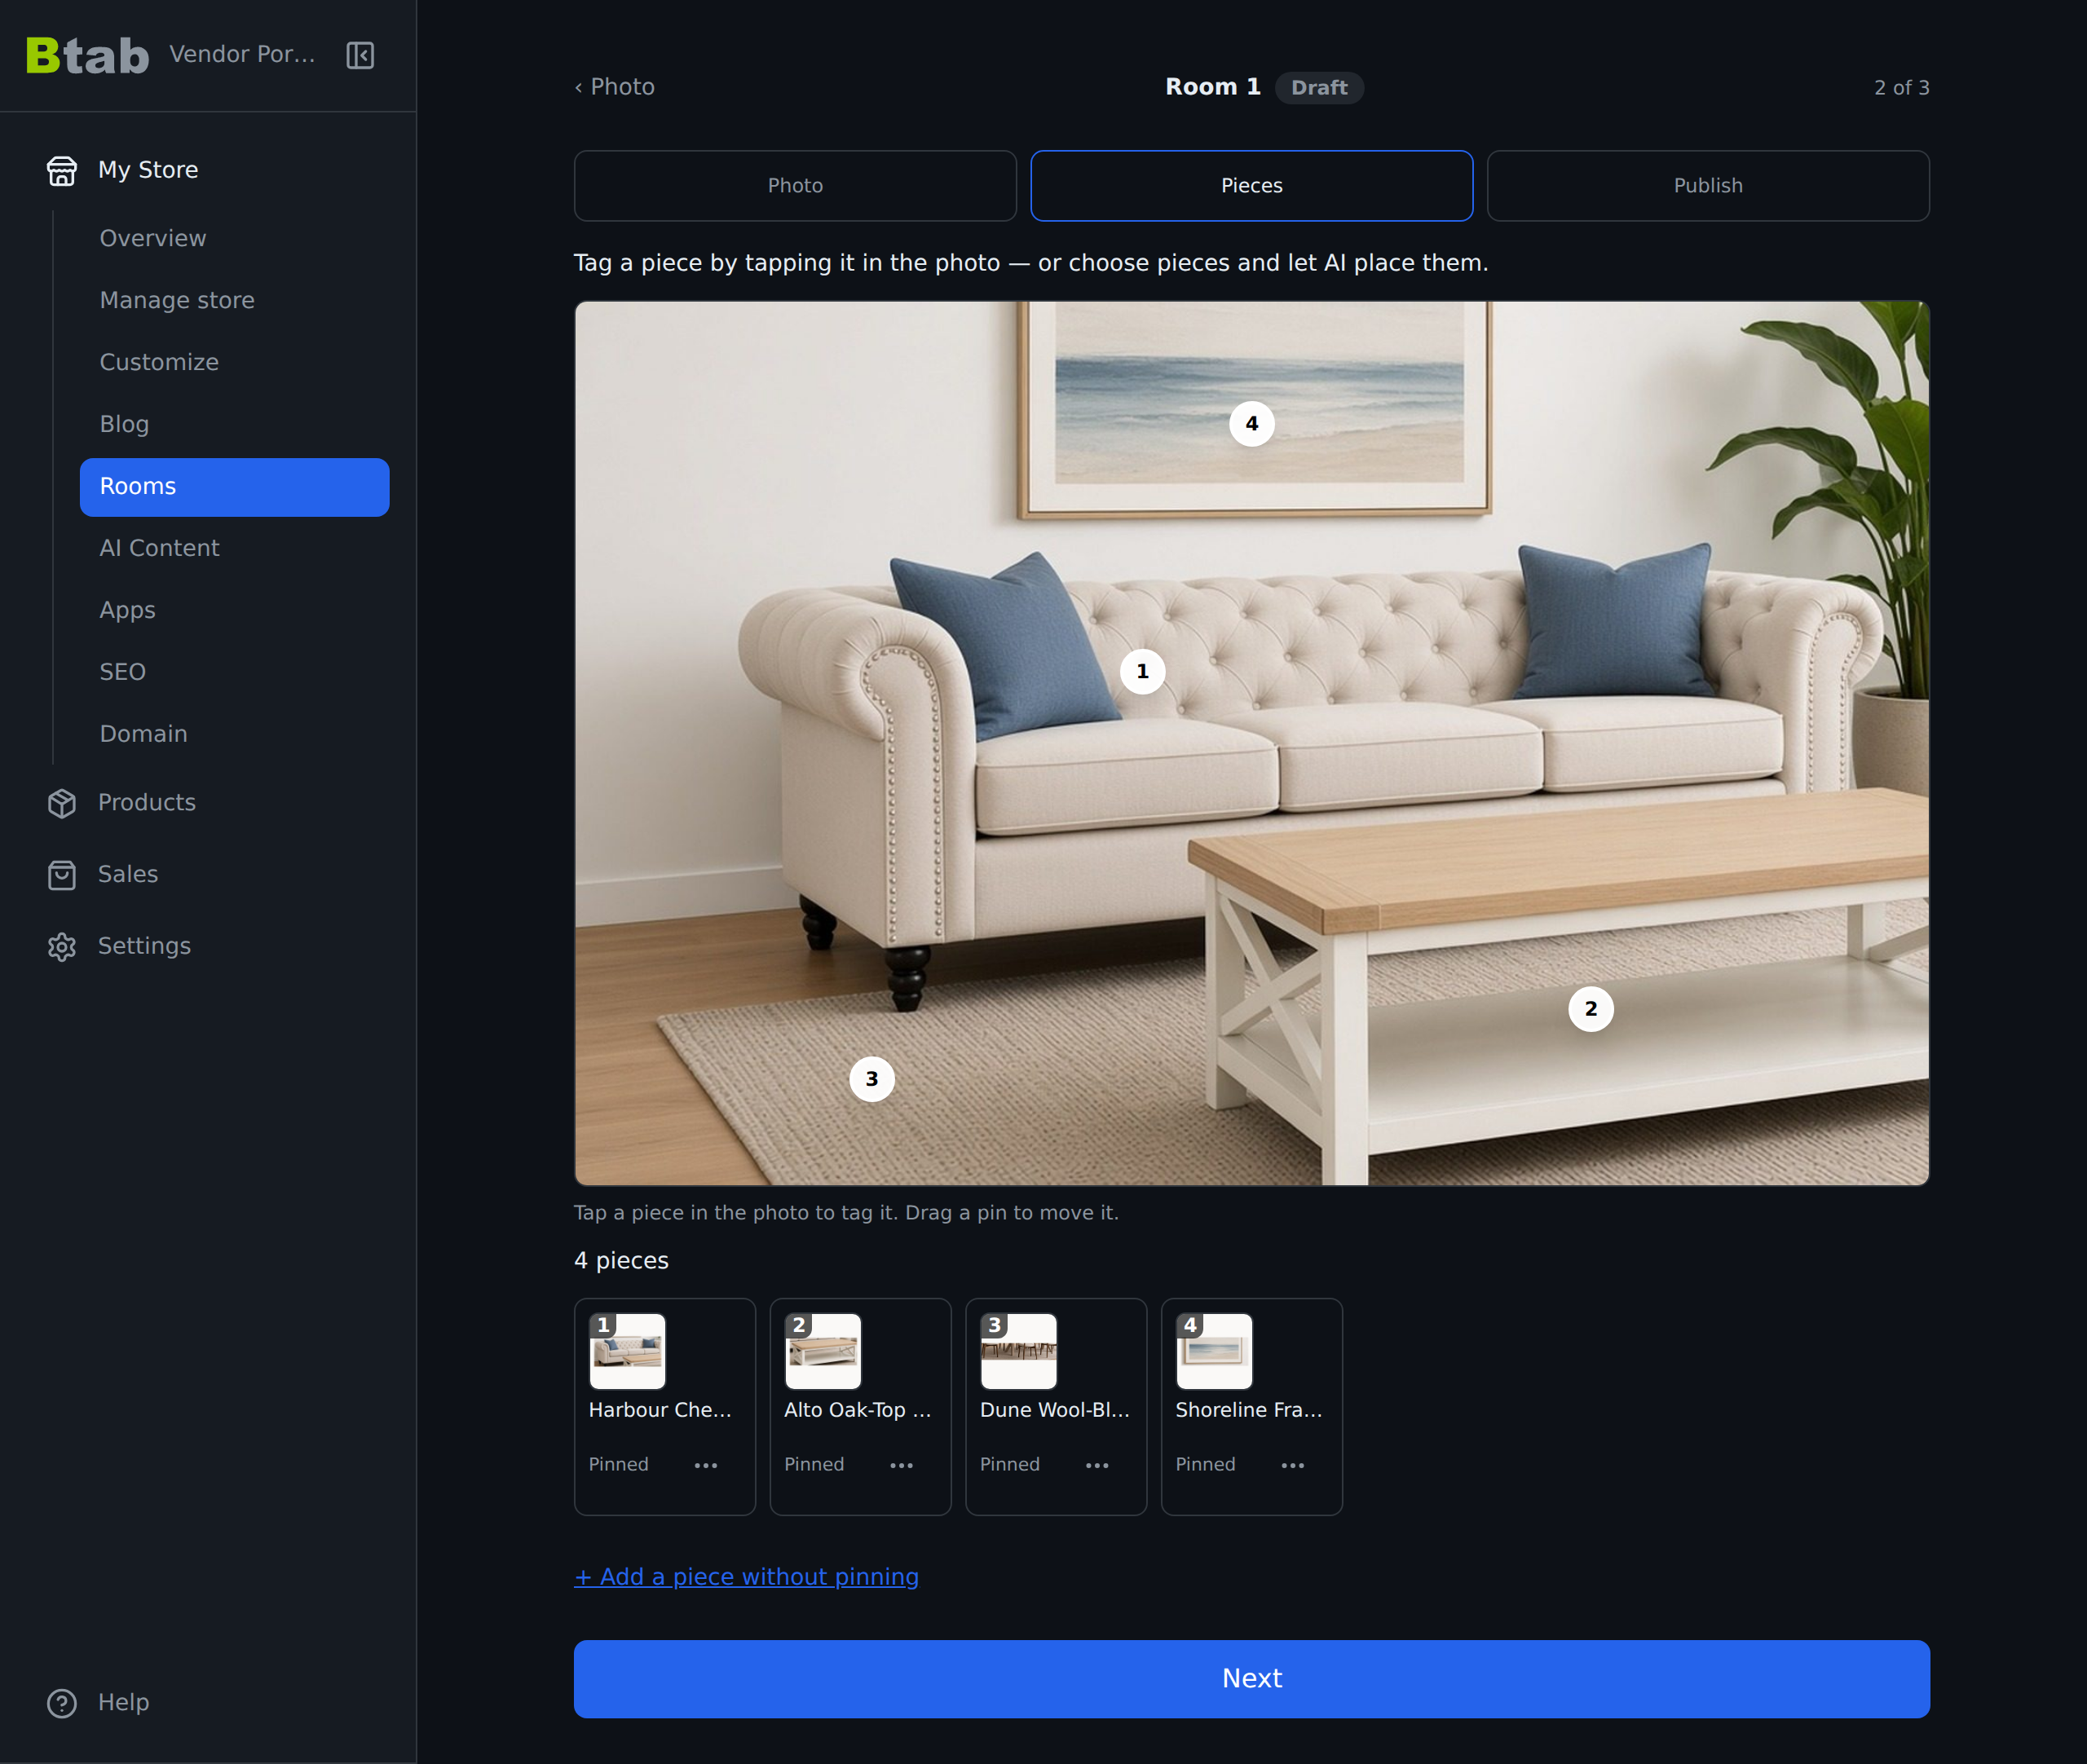
Your pieces and pins are saved when you move to the next step, so you can rearrange them as much as you like first.
Starting from an empty room? If you picked an empty starter room, you choose the pieces first. If your store has a room renderer switched on in Apps (Rooms AI Scenes or Rooms Studio Renders), you'll see Place my pieces in this room. It keeps the room exactly as it is, places your chosen pieces in it, and gives you the result to review. Nothing is used until you choose it.
Step 5: Publish
The last screen is short:
- Room type. Tap a chip (Office, Living, Dining, Bedroom and so on) and it fills in a title for you. You can also type your own title, or tap Suggest a title.
- Intro. Tap + Add a short intro for a line or two about the setup. It's optional, but it helps shoppers and gives search engines more to go on.
- Web address. This is filled in from the title. Tap Change if you want a different one.
Underneath is a preview of exactly how the room will appear at /rooms, including the wording of the button your shoppers will see.
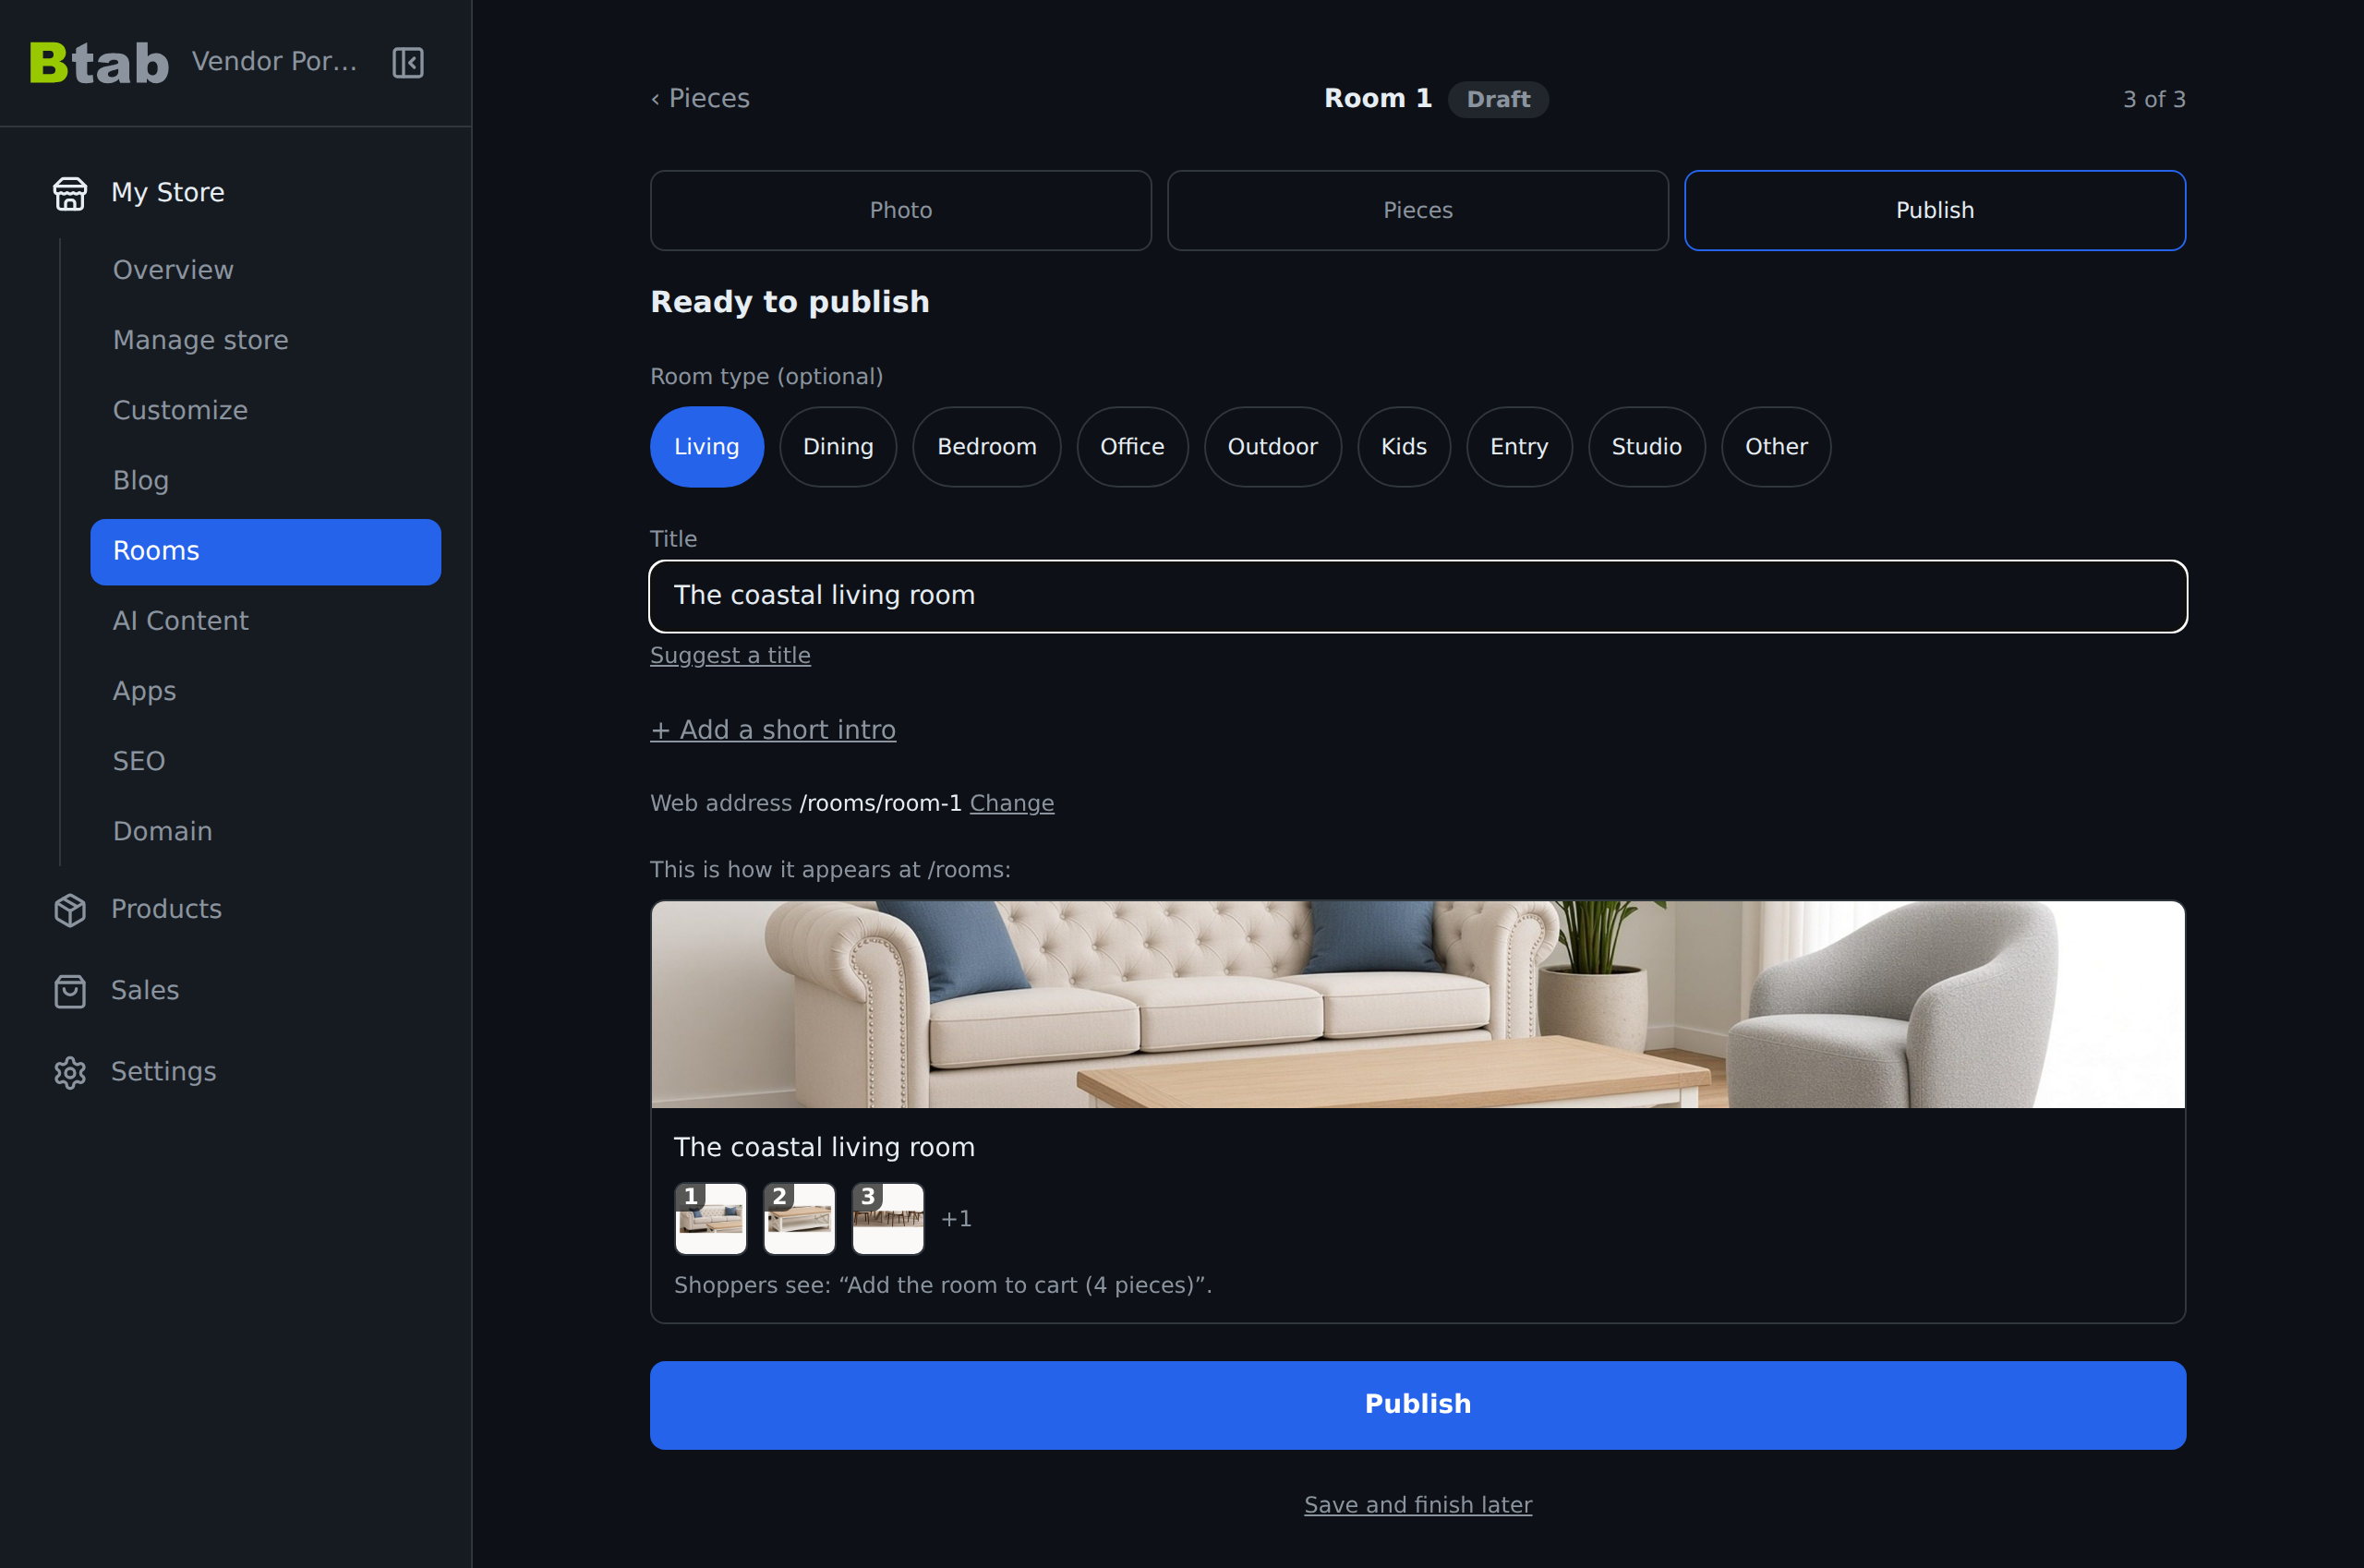
Tap Publish and the room is live. Not ready yet? Save and finish later. The room has been saved as a draft since you added the photo, so you won't lose anything.
After it's live
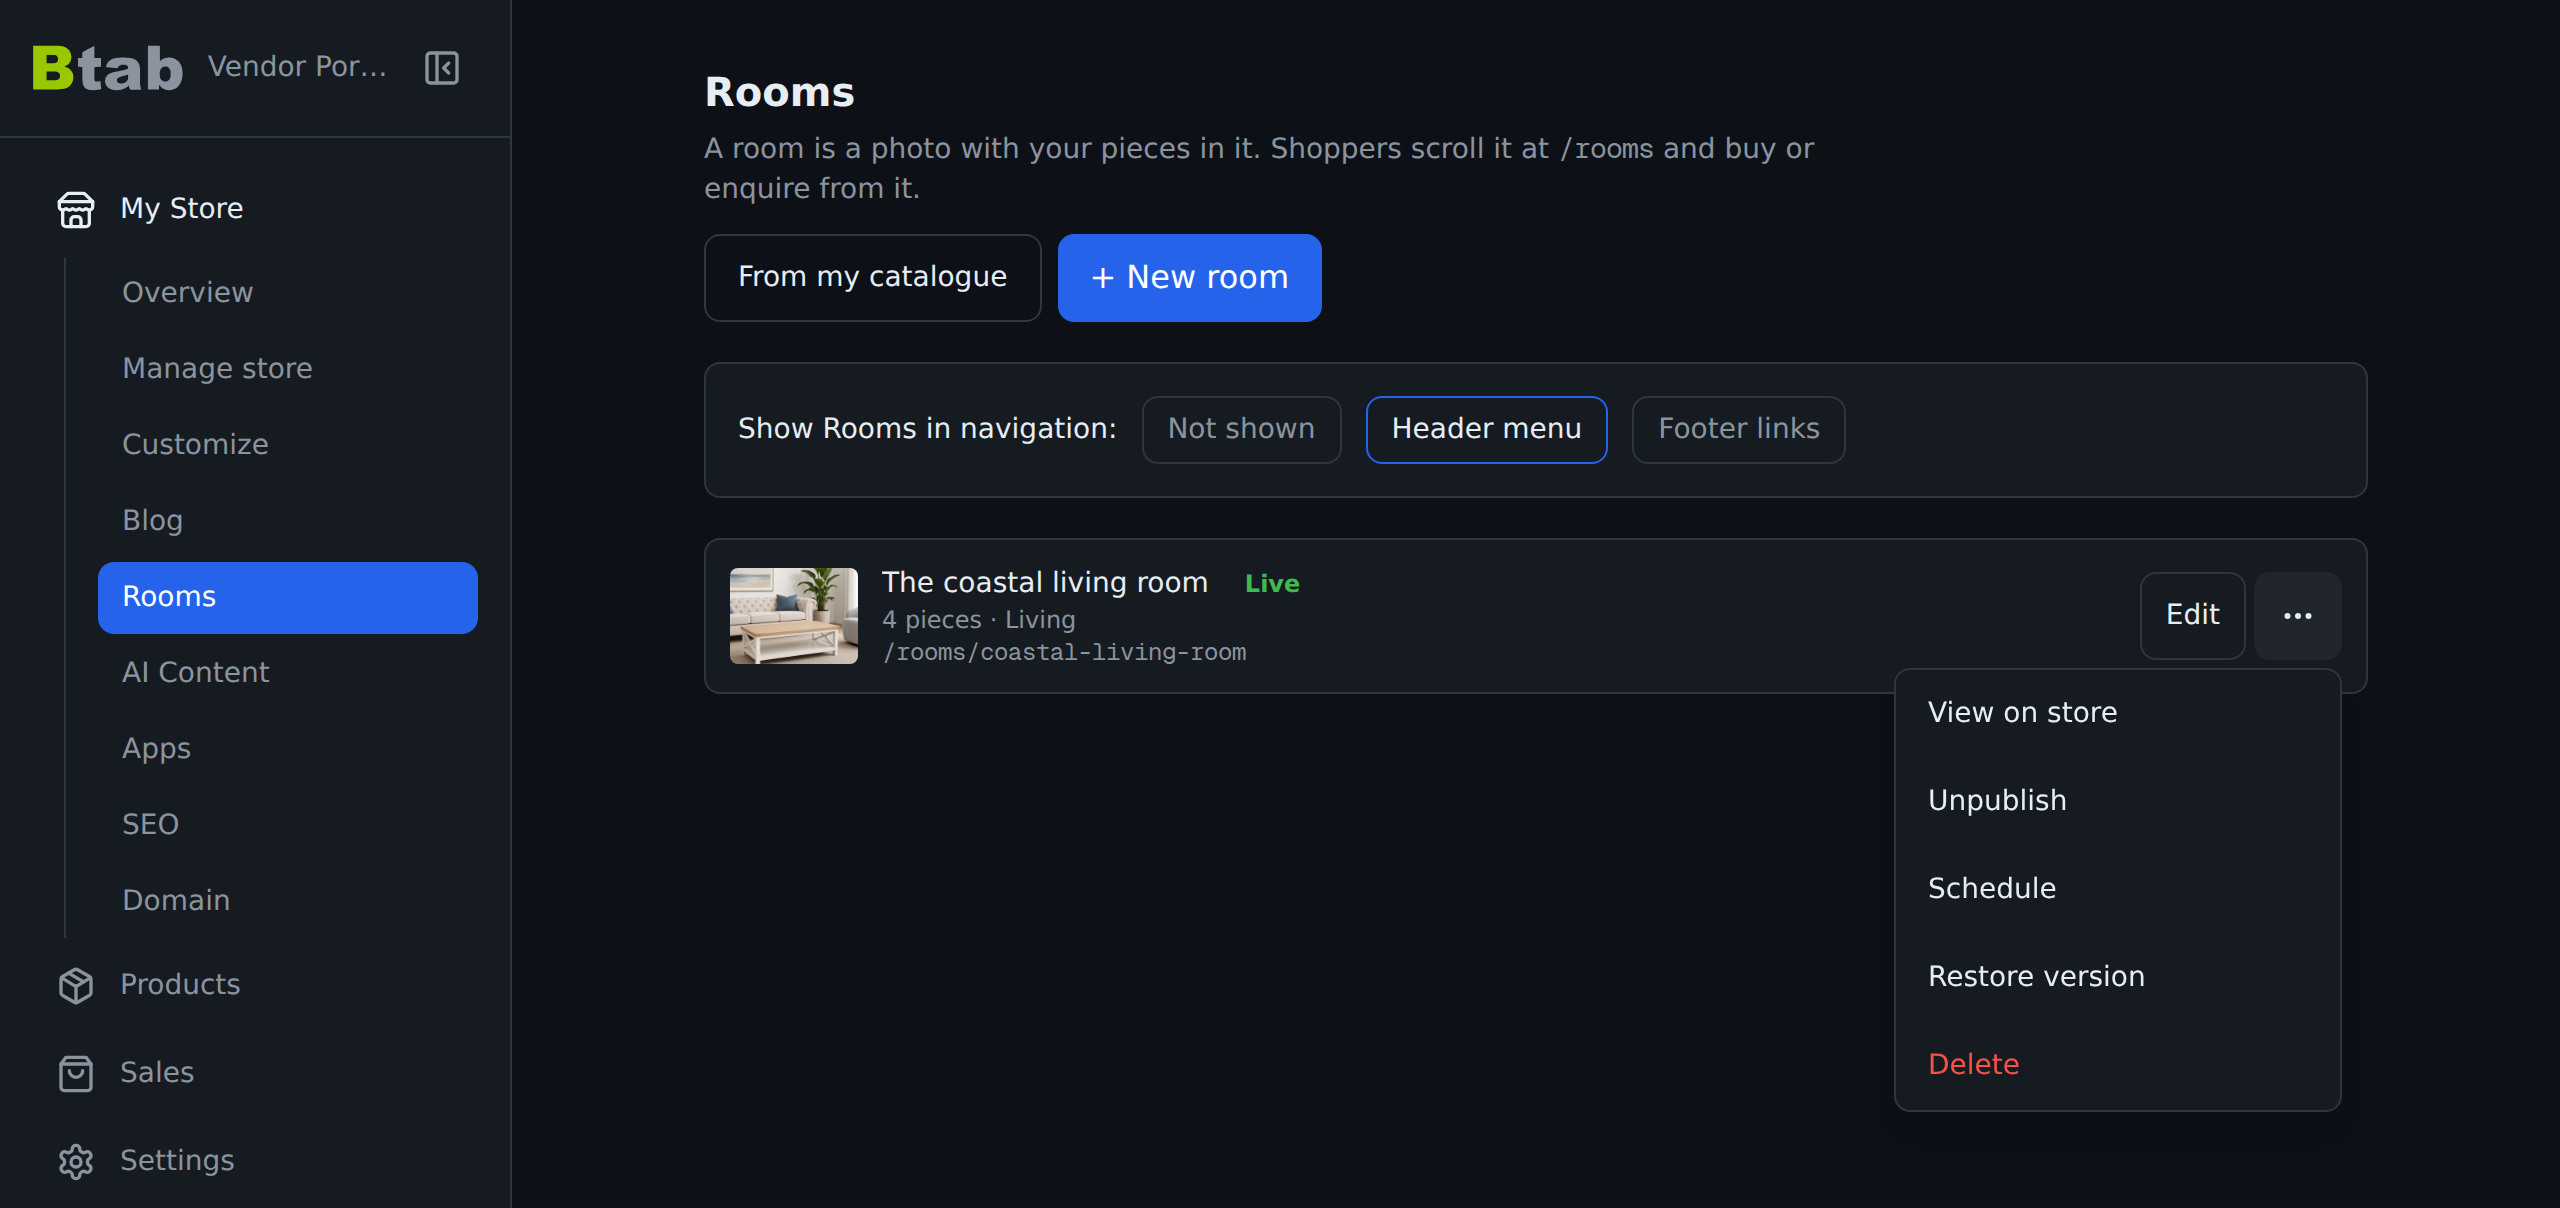
Back on the Rooms page, each room has a ⋯ menu:
- View on store opens the live room page.
- Publish / Unpublish. Unpublishing takes the room off your storefront without deleting it.
- Schedule publishes a room at a set date and time, which is handy for a back-to-work or end-of-financial-year push.
- Restore version. Every change to a room is kept as a version. If an edit goes wrong, put an earlier one back, and the version you replaced stays in the list too.
And this is what your shopper sees: the whole setup, every piece numbered, and one button to buy the room.
Where to start
Start with one room, built from products you already sell together. If you sell office furniture, that's the desk, chair, lamp and shelf people keep buying in the same order. Put them in one room and publish it. Shoppers who used to buy that office one product page at a time can now see the whole setup and take all of it, or just the pieces they want, in one click.
Shop by Room is free and is in My Store → Apps now.